Getting a blister is the fastest way to ruin your day while on the trail or out for a long run. This article will explain how to prevent blisters, how to create a blister kit for running, how to create a blister kit for hiking and some tips on how to prevent and treat blisters.
Preventing Blisters
The best way to avoid the pain of a blister is to prevent it from happening in the first place. Proper fitting shoes, moisture-wicking and well-fitted socks, and comfortable and seamless compression shorts are the best first steps to avoiding blisters. If you know you are prone to specific hot spots, using an anti-chafing cream or body lube will allow the skin to slide with less friction. If you have sweaty feet, you can try using foot powder on your feet and in your shoes.
How to create a trail or ultra running blister kit.
Dealing with blisters is a little different while running versus while hiking. If you’re not in a race, the best thing to do is address hot spots immediately so that they don’t develop into full-blown blisters that could affect your running routine. More often than not, by the time I take my shoes off during a run, the blister has already been broken open already. Here are the items I use as a dedicated blister kit.
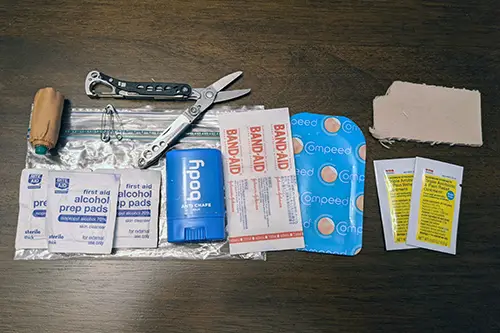
What I carry on me:
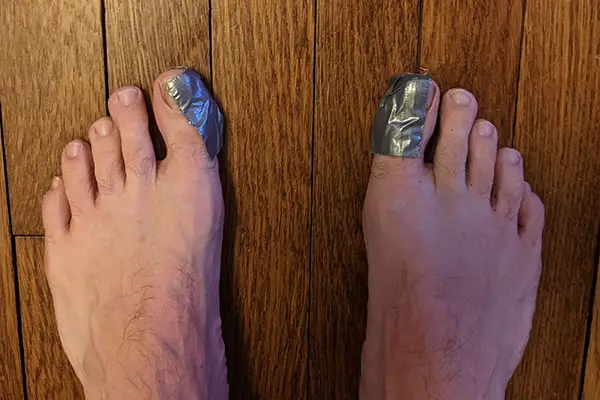
- Protective Tape (Leukotape, KT Tape, duct tape, etc.) – This is a thin tape that is durable and extremely sticky.
- Lube (Body Glide or similar)
- Alcohol Pads
- Safety Pin
- Antibiotic Ointment
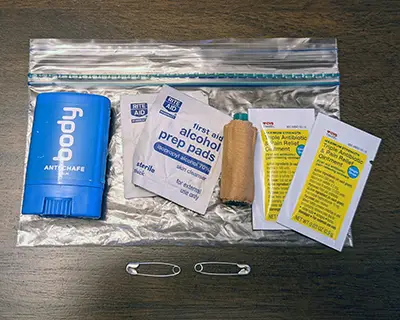
While running, I carry a protective tape to cover up hot spots. It’s best to get something that sticks well, is thin, and is relatively smooth. If it’s smooth, you can actually lubricate the tape. I find the original Body Glide to be easy to apply and very small. I’ve heard that some chapsticks work in a bind but I haven’t tested that yet. I’ve actually never had to pop a blister mid-run, but I keep a needle on hand just in case.
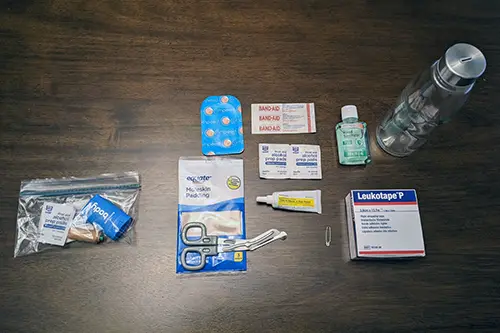
What I have ready in the car:
- Water
- Alcohol Prep Pads
- Safety Pin
- Antibiotic Ointment
- Blister Cushion Bandages / Moleskin
- Scissors to cut and shape Moleskin or Leukotape
Once back at the car, I’ll remove the tape and clean the area with water first, then an alcohol prep pad. Removing the tape usually isn’t a fun process because the skin will be sensitive. At this point, I’ll usually try to not pop a blister unless they are really large. I’ll use either moleskin cut into a donut or a blister cushioning bandage to protect the blister as it heals. Blister bandages should be waterproof and last longer than a day.
For tips on how to create a full first aid kit for running visit this post!
Create a blister kit for hiking.
Getting a blister while hiking always seems more painful to me. There’s so much going on when you’re running, like focusing on your breathing and your steps, that hot spots and blisters tend to be less noticeable until it’s too late. When you’re hiking, you feel every step and tend to think about the pain more. The good news is that hiking with a blister is possible if the correct steps are taken. First, you’ll want to carry these items with you:
- Protective Tape (Leukotape, KT Tape, duct tape, etc.)
- Lube (Body Glide or similar)
- Alcohol Pads
- Safety Pin
- Antibiotic Ointment
- Blister Cushion Bandages / Moleskin
- Scissors to cut and shape Moleskin or Leukotape
How to treat a blister while hiking.
- If you feel a hot spot forming, you’ll want to address it immediately. If it’s very early on, simply applying a lubricant may be enough. To be safe, apply a protective tape first. I find Leukotape and duct tape work the best. This will stop the friction against your skin. You can use Moleskin if you want to lessen the amount of items you carry, just ensure it’s not the padded kind for this application. The padded moleskin works best for cutting donuts to protect a blister that’s already formed.
- If you have a blister forming that is still intact (not popped or broken open) and it’s not very large, try not to pop it. You’ll want to use something that will protect and cushion where the blister has formed. Making a donut with moleskin is one method. If you do this, I suggest adding another layer of protective tape over it to protect it and keep it from peeling off. Another is to use a blister cushion bandage (Compeed, Dr Schols, and Band-Aid are fairly similar). You’ll probably want to use your protective tape on the edges to ensure that the cushion bandage doesn’t come off.
See how you can build your own hiking first aid kit here!
General Tips for Dealing with Blisters.
- Most medical tapes and adhesive bandages (like Band-Aids) are worthless for blisters unless completely covered by a tape specific for blisters or duct tape.
- When using Mokeskin, Leukotape, and similar materials, round the corners before placing it on your skin. Sharper corners are more prone getting pulled off.
- Leukotape and ducttape can be peeled off the roll they come on and re-rolled on itself, straws, lighters, etc to make a smaller and more packable roll.
Where can you buy blister kits?
You can find a few pre-assembled blister kits online at retailers like Amazon as well as medical suppliers. Some outdoor sports stores like REI will carry premade blister kits in stores. Otherwise, most drug stores or big box stores will not carry pre-made kits. The premade kits you will find never have everything your need, so it’s best to DIY your own. You’ll find everything you need at a drug store, big-box store, and probably your local supermarket.
11 Reasons Why You Should DIY Your First Aid Kit
Do you have any tips on how to deal with blisters? What are your recommendations? Leave me a comment below.