A cut on your fingertip can be a real pain! It’s the most likely place to get a paper cut. Or maybe you’ve pulled off a hangnail and taken the surrounding skin with it, leaving an open sore. Unfortunately, your typical Band-Aid is not ideal to protect your fingertip. It creates a sort of “funnel” which collects dirt, water, and debris. This dirt and debris are then allowed to penetrate under the cotton pad and onto the wound since the top of the bandage isn’t well adhered to the finger.
Thankfully, a Band-Aid has been specifically designed to take care of your fingertip. Its hourglass or butterfly shape allows it to better cover the finger and conceal any edges, keeping the cut safe from infection.
How to apply a finger bandage
- Wash your hands – If water and soap isn’t available and you don’t have gloves, do your best to clean your hands and use sand sanitizer if it’s available.
- Clean and disinfect the wound
- Open the bandage wrapper
- Remove one side of the protective backing
- Apply an antibiotic ointment (like Neosporin) to the cotton pad (not required, but suggested)
- Apply the wide portion (butterfly wing) of the bandage to the fingernail side of the fingertip so that approximately half of the bandage extends beyond the fingertip.
- Wrap exposed portion of the “wing” onto the finger, making sure that the pad is fully covering your wound
- Remove the second piece of protective backing
- Wrap the other end of the “wing” around the finger. You should still have half of the bandage sticking up beyond your fingertip.
- You can now wrap the far end of the bandage over the top of the fingertip
- Wrap the two ends of the remaining “wing” over the first
Pro tip: If you work in a dirty or wet environment, or plan to be in one, use a finger cover or “condom” to protect your finger. Apply at the beginning of your task or day, and toss it when it’s done.
How to DIY a fingertip bandage
If you don’t have a fingertip bandage on hand, or if you need a larger bandage than your typical butterfly style, you can DIY your own.
Method 1: Cross method
Use a typical strip bandage (1″x3″) for this method.
- Cut both ends lengthwise from tip to a little before the cotton pad. You want to maintain a little bit of the adhesive portion to keep anything from getting under the pad.
- Remove the protective backing
- Apply the pad to the cut keeping the Band-Aid parallel to the finger
- Cross the strips on one side, making a sort-of “X”. This pulls the edges of the bandage near the pad closer to the finger.
- Do the same thing on the opposite side with the remaining two legs
Method 2: Butterfly method
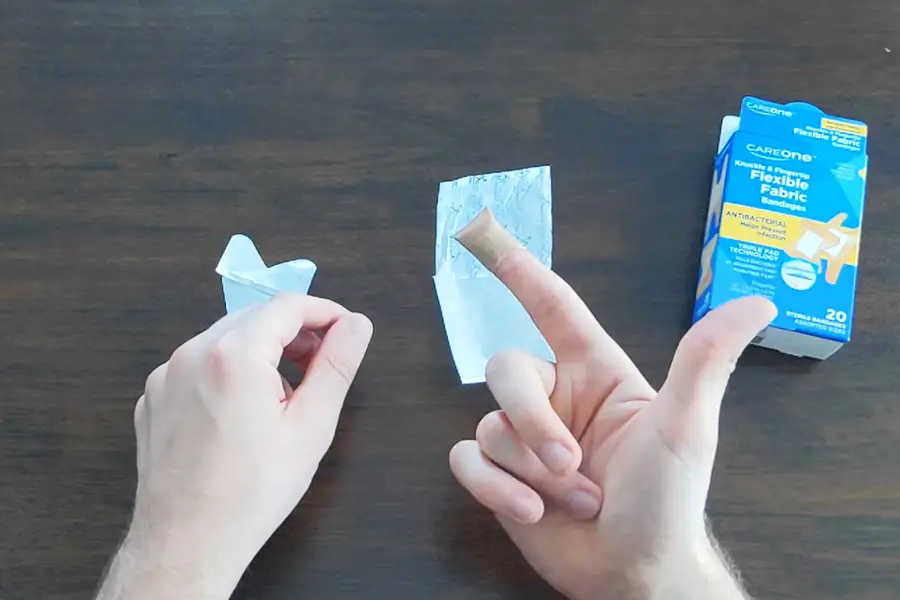
This will need to be done with a larger bandage than your typical 1″x3″ since we’ll be cutting the bandage to look similar in shape to a store-bought fingertip bandage.
- Cut a notch out of the long side of a Band-Aid on either side. Start off with a small notch, test it, and adjust as needed. Keeping the protective backing on will make this much easier.
- Apply it to your fingertip similar to the steps for a store bought fingertip bandage.
What’s your experience with fingertip bandages? Let us know in the comments below.