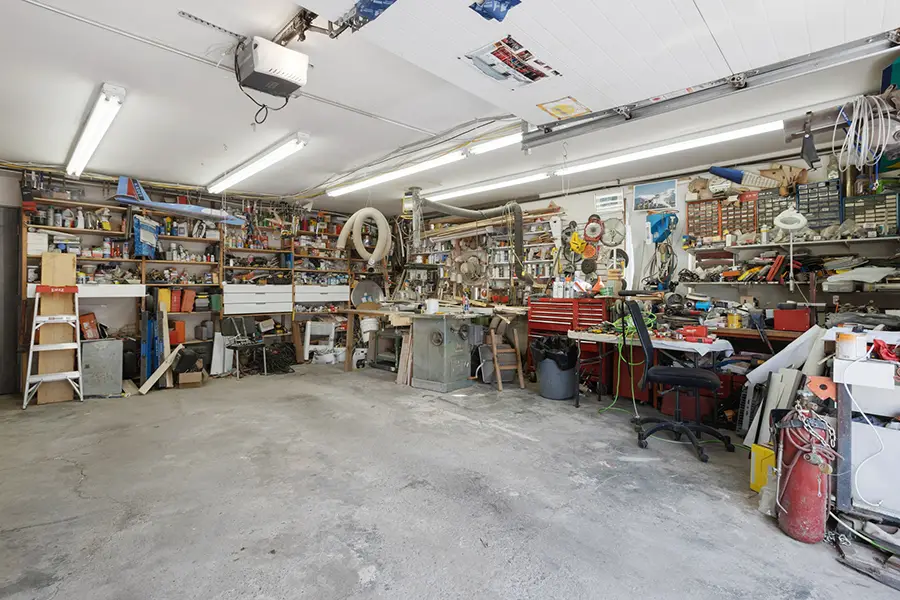
If you’re a mechanic, woodworker, or even a weekend warrior, you know that the work is inherently dangerous. I can’t think of how many cuts or burns I’ve gotten from working in a garage or doing projects in the basement. But I’ve been lucky, almost everything that’s happened to me could be addressed with some Band-Aids and ibuprofen. Power tool accidents can very easily take off a finger, and debris can do some serious damage to your eyes. Even when you’re taking the necessary precautions like wearing safety glasses, injuries can still occur. Having a first aid kit on hand is the best thing you can do to address potential injuries yourself or to provide first aid until you can get professional help.
Get yourself a good case
Getting yourself a good case is one of the most important steps you’ll take in putting together your garage first aid kit. And just as important is where you’re going to keep that first aid kit. Garages tend to get messy, and stuff can pile up, so a wall-mounted case it’s most likely your best option. When the time comes to access it, you don’t want to have to rummage through your Christmas decorations to get there. It’s also more visible, so anyone not familiar with your garage will be able to find it quickly and easily. Also, consider how easy it is to open with one hand. If you’re alone, you may need to get in there with an injured hand.

Unique considerations for your first aid kit
Although your average first aid kit will probably contain a lot of the items you’re going to need, there are some unique scenarios that you should plan for ahead of time given the type of work that’s done in the garage. The American College of Emergency Physicians’ First Aid Manual was referenced for this following section and is a good reference to keep at your garage or shop.
Hand washing
The first step to most minor first aid incidents is to clean the wound. If you’ve done any work on your car, you know that it can take some time to scrub off the grease and grime. Having a good hand scrub on hand, if you don’t already, can help you get cleaned up quickly to take care of yourself or someone else. Something like Gojo Industrial Hand Cleaner is a good option.
Items to keep on hand: industrial hand cleaner and towels
Eye care and first aid
Wearing safety glasses is one of the first things we learn when working with power tools, but they don’t always protect you. Or in that one second that you decide to take them off, something is bound to happen. If you don’t have a sink in your garage or close by, you should definitely consider keeping saline eyewash with your kit. The wall-mounted stations are a great option so it’s easy to find and easy to rinse the eye out quickly. You can then get to sink if you need to.
Items to keep on hand: saline eyewash and a mirror

Shards of metal or wood
Let’s say you’re using an air hammer and BOOM, the bit breaks. Or you’re using a chisel to pop a rivet and a shard of metal shoots off. That shard of metal can easily hit you, and now you’re left with a foreign object in your skin. If it’s small and not too deep, you can remove it yourself. If you can’t remove it yourself, seek medical attention because foreign objects are prime for infection. Having multiple types of tweezers on hand can help. Sharp tipped tweezers can get into the wound if needed, while broad tipped tweezers might make it easier to grab objects with. Hemostats are great for larger objects and can lock once you grab it. Magnets can help to locate metal objects under the skin.
Items to keep on hand: Good tweezers, hemostats, needle nose pliers
Severe cuts
If you’re severely cut, chances are you’ll need to see a doctor, but your first priority should be to stop the bleeding. Having material on hand (and a lot of it) will make this easier. A good, easy, and cheap way to prepare for a bleeding event is to use some old t-shirts or towels. But you don’t want to use your dirty rags! I suggest you find some materials and place them in boiling water for several minutes to ensure they’re sterile. Store them in several ziplock or vacuum-sealed bags so that they are ready to go when the time comes.
Pressure on a wound is a key ingredient to stopping bleeding. You should consider specialty bandages that maintain pressure once placed so that you can move on to other things (like driving to a hospital!). These bandages are often referred to as Israeli bandages or pressure bandages and were originally created for military use.
Another option is to keep some type of hemostatic agent in your kit. Hemostatic agents help the blood to clot faster and come in two forms: a powder and a bandage that is impregnated with the agent. Both are good options, but I tend to like the bandage more because messing with a powder that can spill when you’re panicking about the blood can be problematic. All of them sting, and some of them contain shellfish, so do some research before purchasing.
Items to keep on hand: Dressings like gauze, sterile cloth, and pressure bandages. Consider a hemostatic agent.
Minor cuts
For smaller cuts, Band-Aids can be a real pain in the neck when you’re working with your hands. After the wound is clean and any bleeding has stopped, you can use a liquid bandage product like New Skin, which is essentially a glue that hardens to protect the wound and keep the skin in place. It can hold up to abuse and water much better than any adhesive bandage. The other option is to use tincture of benzoin which, in this case, is used as a topical adhesive. You can apply on to the skin prior to applying the bandage to make it stick better. You can also leave it exposed on the skin to “toughen it up” and protect it from rubbing.
Item to keep on hand: liquid bandage, tincture of benzoin
Amputations
The thought of losing a limb or finger is not one that we want to think of, but the fact is that it’s completely possible in this kind of setting. Tools like angle grinders and table saws can easily remove a digit. Thankfully, if you act quickly and take the correct steps, in many cases the amputated member can be re-attached. After an ambulance has been called and the bleeding has been managed, you’ll want to place the digit in a soft fabric and in a ziplock bag. You’ll then want to keep it cool, but not let it freeze or come in direct contact with ice. If ice isn’t available, having a few instant ice packs on hand can help keep it cool.
Items to keep on hand: Ziplock bag (or plastic wrap), instant cold packs (if ice isn’t available), trauma kit to stop blood loss
Burns
Many minor burns, from touching a hot exhaust pipe or something similar, can be handled on your own. After the wound is rinsed under cool water for at least 10 minutes (more is better), loosely apply plastic wrap or gauze and an ointment to keep it from sticking. Be careful not to apply any adhesive tape to the burn and keep it loose since it will likely swell. There are specialty burn dressings on the market that help to soothe and cool the burn.
You’ll want to get to a hospital or call an ambulance for:
- Electrical burns
- Chemical burns
- Inhalation burns
- Blistering burns that cover more than 10% of the body or on any sensitive areas
- Full depth burns (burns that cause loss of feeling to the skin or damage nerves, muscle, fat tissue, or blood vessels)
- If you’re unsure, go to the hospital.
Items to keep on hand: gauze, plastic wrap, specialty dressings
Protecting your airways
There isn’t a whole lot you can do after the fact when it comes to inhalation injuries except seek medical attention. Take the proper precautions and always keep masks or respirators in the garage that are appropriate to the tasks you’re doing. Make sure you’re exhausting any harmful fumes as well. The most common types of masks for the garage are:
- Dust masks – Often disposable and good for dust and welding fumes. Not good for gases or vapors. Get the kind with two straps since the single strap ones are usually not NIOSH approved.
- Half-mask respirator – Good for most vapors, acid gases, dust, or welding fumes.
- Full-mask respirator – Similar to half-mask respirators but offer additional protection to the eyes and face.
Items to keep on hand: mask or respirator appropriate for the task
First aid kit contents
Here is a list of items that should be considered for your first aid kit. Use it as a shopping list or a way to evaluate a pre-made first aid kit.
- Nitrile gloves (several pairs)
- Masks or other PPE appropriate to the work you’re doing
- Adhesive bandages of different sizes and shapes
- Antiseptic solution
- Gauze pads in a variety of sizes
- Gauze rolls
- Medical tape
- Roller bandage or vet wrap
- A few triangle bandages
- Antibiotic ointment
- Liquid bandage
- Amputation kit (ziplock bag, sterile cloth, instant ice packs)
- Eye rinse solution
- Eye pad
- Scissors
- Quality tweezers
- Hemostats/pliers
- Tourniquet(s)
- Severe bleeding tools (pressure bandages, hemostatic agents)
- OTC medications (Aspirin, Ibuprofen)
- Burn dressings
- First aid manual
Best garage first aid kit options
Although any pre-assembled kit will need to be tweaked to meet your needs, here are a few options that are a good starting point.
What kind of first aid kit do you have in your garage? Let us know in the comments.


